Cacti_install
软件版本:
Nginx nginx/1.19.2
mariadb 10.4.14-MariaDB
php PHP 7.2.32
cacti cacti-1.2.14
安装步骤:
- 准备环境
- 部署Lnmp架构
- 安装cacti到网站根目录并进行配置
- 安装常用插件
准备环境
系统环境准备:
hostnamectl set-hostname cacti ## 修改主机名,完成后重新登录下即可
setenforce 0 ##  临时关闭selinux
sed -i  "/^SELINUX=/cSELINUX=disabled"  /etc/selinux/config ## 永久关闭selinux
systemctl stop firewalld ## 关闭防火墙
systemctl disable firewalld ## 关闭防火墙自启动
yum install wget vim -y
yum源准备:
编辑文件vim /etc/yum.repos.d/nginx.repo:
[nginx]
name = nginx repo
baseurl = https://nginx.org/packages/mainline/centos/7/$basearch/
gpgcheck = 0
enabled = 1
编辑文件vim /etc/yum.repos.d/mariadb.repo:
# MariaDB 10.4 CentOS repository list - created 2019-11-05 11:56 UTC
# <http://downloads.mariadb.org/mariadb/repositories/>
[mariadb]
name = MariaDB
baseurl = http://yum.mariadb.org/10.4/centos7-amd64
gpgkey=https://yum.mariadb.org/RPM-GPG-KEY-MariaDB
gpgcheck=1
php准备:
rpm -Uvh https://mirrors.cloud.tencent.com/epel/epel-release-latest-7.noarch.rpm##安装epel源
rpm -Uvh https://mirror.webtatic.com/yum/el7/webtatic-release.rpm ##安装webstatic源
2-1 部署Nginx
yum install -y nginx ## 安装
systemctl start nginx ## 启动
systemctl enable nginx ## 设置服务开机自启动
Nginx配置测试的的虚拟主机:
将/etc/nginx/conf.d/default.conf中的内容替换为:
server {
 listen       80;
 root   /usr/share/nginx/html;
 server_name  localhost;
 #charset koi8-r;
 #access_log  /var/log/nginx/log/host.access.log  main;
 #
 location / {
       index index.php index.html index.htm;
 }
 #error_page  404              /404.html;
 #redirect server error pages to the static page /50x.html
 #
 error_page   500 502 503 504  /50x.html;
 location = /50x.html {
   root   /usr/share/nginx/html;
 }
 #pass the PHP scripts to FastCGI server listening on 127.0.0.1:9000
 #
 location ~ .php$ {
   fastcgi_pass   127.0.0.1:9000;
   fastcgi_index  index.php;
   fastcgi_param  SCRIPT_FILENAME  $document_root$fastcgi_script_name;
   include        fastcgi_params;
 }
}
2-2 部署Mariadb
yum install -y MariaDB-server MariaDB-client ## 安装
systemctl start mariadb
systemctl enable mariadb
配置mariadb:
vim /etc/my.cnf.d/server.conf
[mysqld]
innodb_buffer_pool_size = 1024M
innodb_buffer_pool_instances = 9
innodb_large_prefix = 1
innodb_io_capacity_max = 10000
innodb_io_capacity = 5000
innodb_doublewrite = ON
join_buffer_size = 200M
bind-address = 0.0.0.0
character_set_server=utf8mb4
collation-server=utf8mb4_unicode_ci
max_allowed_packet=18M
max_heap_table_size=98M
tmp_table_size=64M
innodb_flush_log_at_timeout=3
innodb_read_io_threads=32
innodb_write_io_threads=16
log-error                      = /var/log/mysql/mysql-error.log
log-queries-not-using-indexes  = 1
slow-query-log                 = 1
slow-query-log-file            = /var/log/mysql/mysql-slow.log
innodb_file_format = 	Barracuda
创建cacti用户和cacti数据库:
mysql ##进入mariadb数据库

create database cacti; ##创建cacti数据库
GRANT ALL PRIVILEGES ON cacti.* TO 'cacti'@'%' IDENTIFIED BY 'cacti' 创建用户并给予权限
GRANT SELECT ON mysql.time_zone_name TO 'cacti'@'%'; ## 授权cacti用户有查看mariadb的时区的权限
FLUSH PRIVILEGES; ## !!!很重要,让权限生效
使用可用时区填充时区表:
mysql_tzinfo_to_sql /usr/share/zoneinfo | mysql -u root -p mysql3-3 部署Php
安装相关软件包:
yum install -y php72w-fpm php72w-process  php72w-common \\
php72w-mysqlnd php72w-cli php72w-gd php72w-mbstring php72w-snmp \\
php72w-pdo mod_php72w php72w-ldap
编辑php的主配置文件:
vim /etc/php.ini
date.timezone = Asia/Shanghai ##找到这一行,修改时区
cgi.fix_pathinfo=0 ##将这个参数设置为0,内网使用的话也可以不设置,这是一个php的漏洞
memory_limit = 400M
max_execution_time = 60
date.timezone = Asia/Shanghai
启动php-fpm:
systemctl start php-fpm
systemctl enable php-fpm
测试一下lnmp环境:
创建测试文件:
vim /usr/share/nginx/html/test.php:
<?php
$link=mysqli_connect("localhost","cacti","cacti");
if(!$link) echo "FAILD!连接错误,用户名密码不对";
else echo "OK!可以连接";
?>
重启mariadb和nginx:
systemctl restart nginx
systemctl restart mariadb
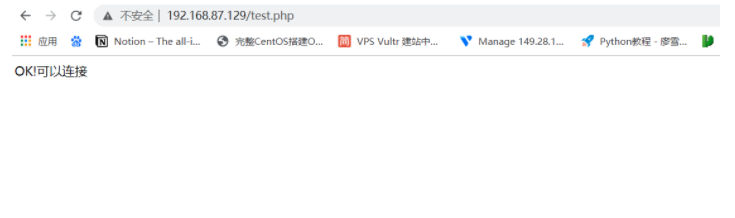
浏览器访问出现以下界面即为正常:
部署cacti并进行配置:
下载cacti安装包:
wget https://www.cacti.net/downloads/cacti-1.2.14.tar.gz
mv cacti-1.2.14.tar.gz /usr/share/nginx/html/cacti ##移动cacti到网站根目录,并改名
## 权限设置:
chown -R nginx.nginx /usr/share/nginx/html/cacti/resource/snmp_queries/
chown -R nginx.nginx /usr/share/nginx/html/cacti/resource/script_server/
chown -R nginx.nginx /usr/share/nginx/html/cacti/resource/script_queries/
chown -R nginx.nginx /usr/share/nginx/html/cacti/scripts/
chown -R nginx.nginx /usr/share/nginx/html/cacti/log/
chown -R nginx.nginx /usr/share/nginx/html/cacti/cache/boost/
chown -R nginx.nginx /usr/share/nginx/html/cacti/cache/mibcache/
chown -R nginx.nginx /usr/share/nginx/html/cacti/cache/realtime/
chown -R nginx.nginx /usr/share/nginx/html/cacti/cache/spikekill/
## 创建cacti日志文件:
touch /usr/share/nginx/html/cacti/log/cacti.log
## 给权限
chmod 777 /usr/share/nginx/html/cacti/log/cacti.log
创建cacti的虚拟主机:
rm -rf /etc/nginx/conf.d/default.conf ##删除/etc/nginx/conf.d/default.conf
vim /etc/nginx/conf.d/cacti.conf ##创建cacti的虚拟主机,配置以下内容

# Advanced config for NGINX
#server_tokens off;
add_header X-XSS-Protection "1; mode=block";
add_header X-Content-Type-Options nosniff;

# Redirect all HTTP traffic to HTTPS

# SSL configuration
server {
   listen 80;
   server_name cacti.yourdomain.com;
   root /usr/share/nginx/html/cacti;
   index index.php index.html index.htm;

   # Compression increases performance0
   gzip on;
   gzip_types      text/plain text/html text/xml text/css application/xml application/javascript application/x-javascript application/rss+xml applicaiton/xhtml+xml;
   gzip_proxied    no-cache no-store private expired auth;
   gzip_min_length 1000;

   location / {
      try_files $uri $uri/ /index.php$query_string;
   }

   error_page 404 /404.html;
   error_page 500 502 503 504 /50x.html;
   location = /50x.html {
      root /usr/share/nginx/html/;
   }

   location ~ \\.php$ {
      alias /usr/share/nginx/html/cacti;
      index index.php
      try_files $uri $uri/ =404;
      fastcgi_split_path_info ^(.+\\.php)(/.+)$;

      # you may have to change the path here for your OS
      fastcgi_pass 127.0.0.1:9000;
      fastcgi_index index.php;
      fastcgi_param SCRIPT_FILENAME $document_root$fastcgi_script_name;
      include /etc/nginx/fastcgi_params;
   }

   location /cacti {
      root /usr/share/nginx/html/;
      index index.php index.html index.htm;
      location ~ ^/cacti/(.+\\.php)$ {
         try_files $uri =404;
         root /usr/share/nginx/html;

         # you may have to change the path here for your OS
         fastcgi_pass 127.0.0.1:9000;
         fastcgi_index index.php;
         fastcgi_param SCRIPT_FILENAME $document_root$fastcgi_script_name;
         include /etc/nginx/fastcgi_params;
      }

      location ~* ^/cacti/(.+\\.(jpg|jpeg|gif|css|png|js|ico|html|xml|txt))$ {
         expires max;
         log_not_found off;
      }
   }

   location /doc/ {
      alias /usr/share/nginx/html/cacti/doc/;
      location ~* ^/docs/(.+\\.(html|md|txt))$ {
         root /usr/share/nginx/html/cacti/;
         autoindex on;
         allow 127.0.0.1; # Change this to allow your local networks
         allow ::1;
         deny all;
      }
   }

   location /cacti/rra/ {
      deny all;
   }
   ## Access and error logs.
   access_log /var/log/nginx/cacti_access.log;
   error_log  /var/log/nginx/cacti_error.log info;

}
导入cacti数据库:
mysql -uroot -p cacti</usr/share/nginx/html/cacti/cacti.sql配置php-fpm:
vim /etc/php-fpm.d/www.con 修改以下字段,带有;是注释,取消即可
listen.owner = nginx
listen.group = nginx
user = nginx
group = nginx
权限设置:
chmod 777 /var/lib/php/session计划任务设置:
vim /etc/cron.d/cacti,加入如下配置:
*/1 * * * * nginx php /usr/share/nginx/html/cacti/poller.php &>/dev/null安装rrdtool以及snmp:
## rrdtool
yum install -y rrdtool
## snmp
yum install -y net-snmp net-snmp-utils
echo "rocommunity public" > /etc/snmp/snmpd.conf
systemctl enable snmpd
systemctl start snmpd
编辑cacti的配置文件:
vim /usr/share/nginx/html/cacti/include/config.php
$database_type     = 'mysql';
$database_default  = 'cacti';
$database_hostname = 'localhost';
$database_username = 'cacti';
$database_password = 'cacti';
$database_port     = '3306';
$database_retries  = 5;
$database_ssl      = false;
$database_ssl_key  = '';
$database_ssl_cert = '';
$database_ssl_ca   = '';
浏览器访问开始进行部署:
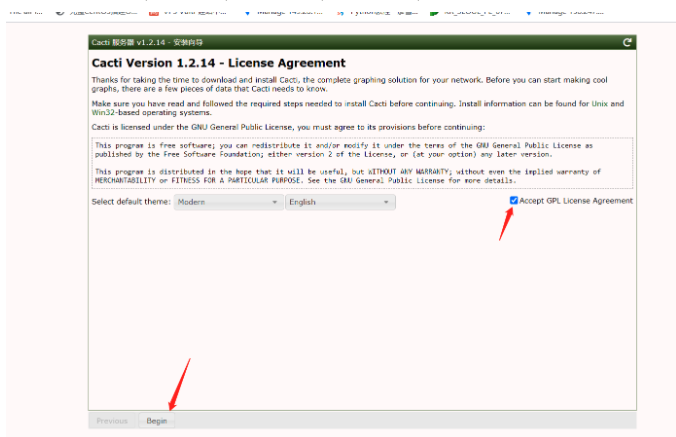
modern是默认主题,可以更改,语言不用改,勾上对勾后,点击开始即可开始安装
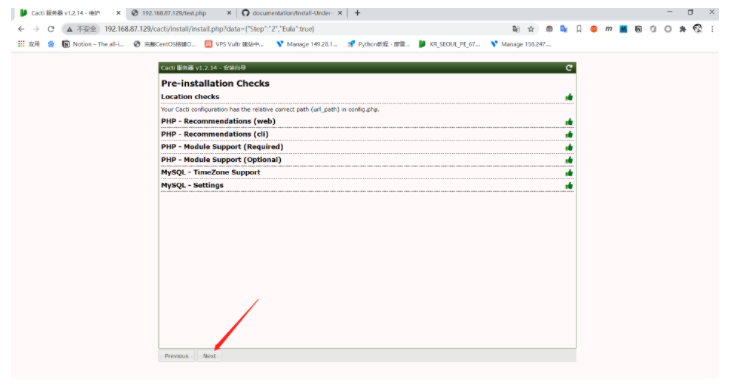
这是cacti的部署环境检查,如下图,所有的配置检测都通过了,点击next即可:
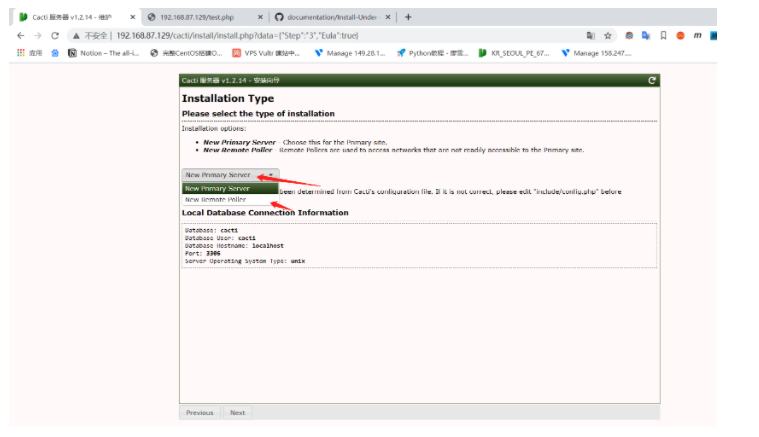
这一步选择是主节点部署,还是代理部署,选择主节点部署即可:
这一步是权限检测,:
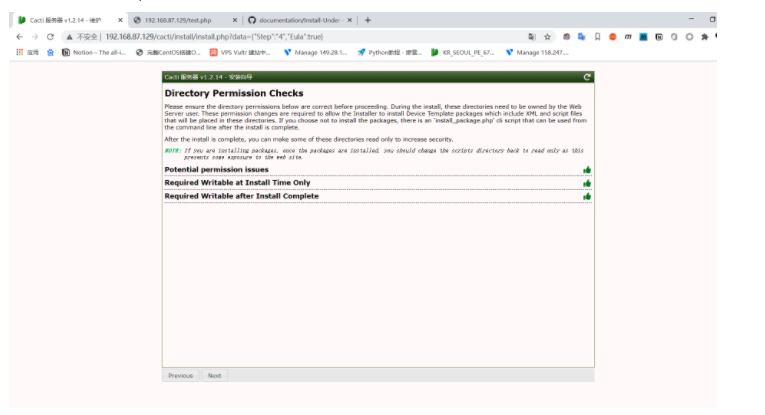
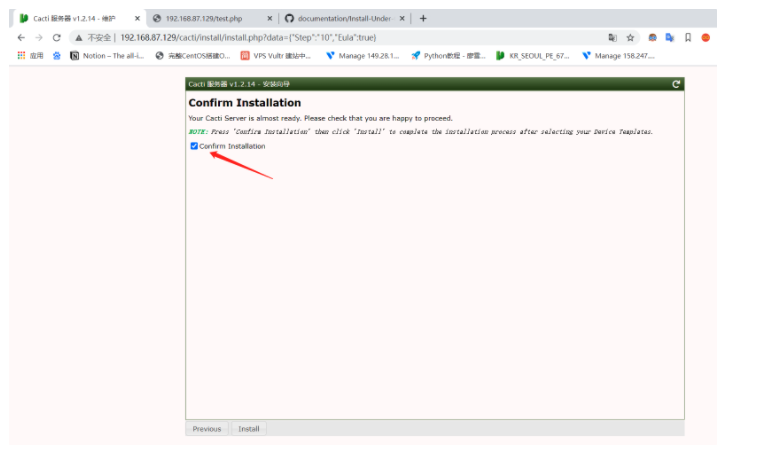
其余步骤就点击next继续即可,到了这个界面之后将对勾点上,即可开始安装:
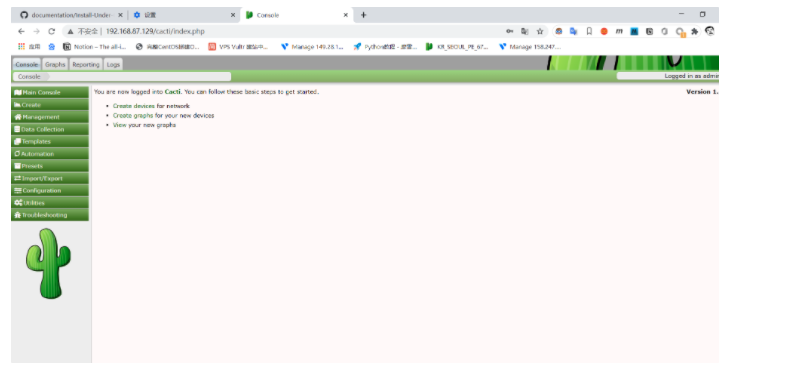
安装完成后将浏览器缓存清空以下或者换个浏览器再访问即可:
cacti的插件部署:
Spine插件部署:
此插件用于为cacti进行加速
-
安装相关的软件包
yum install -y autoconf automake libtool dos2unix help2man \\ openssl-devel mariadb-devel net-snmp-devel gcc gcc-c++ -
下载插件包
wget <https://www.cacti.net/downloads/spine/cacti-spine-1.2.14.tar.gz> tar xf cacti-spine-1.2.14.tar.gz ##解压缩 cd cacti-spine-1.2.14 ##cd到此目录 ./bootstrap ##生成configure文件 ##执行以下步骤编译即可 make clean 可以清空编译缓存重新编译 ./configure make make install config/install-sh -c -d '/usr/local/spine/bin' /bin/sh ./libtool --mode=install /usr/bin/install -c spine '/usr/local/spine/bin'## 这个命令执行完后会输出libtool: install: /usr/bin/install -c spine /usr/local/spine/bin/spine -
编辑spine的配置文件
mv -v /usr/local/spine/etc/spine.conf.dist /usr/local/spine/etc/spine.conf修改以下参数
DB_Host       localhost
DB_Database   cacti
DB_User       cacti
DB_Pass       cacti
DB_Port       3306
部署完成~
部署其他常用插件:
cd /usr/share/nginx/html/cacti/plugins 开始部署插件
插件的获取:
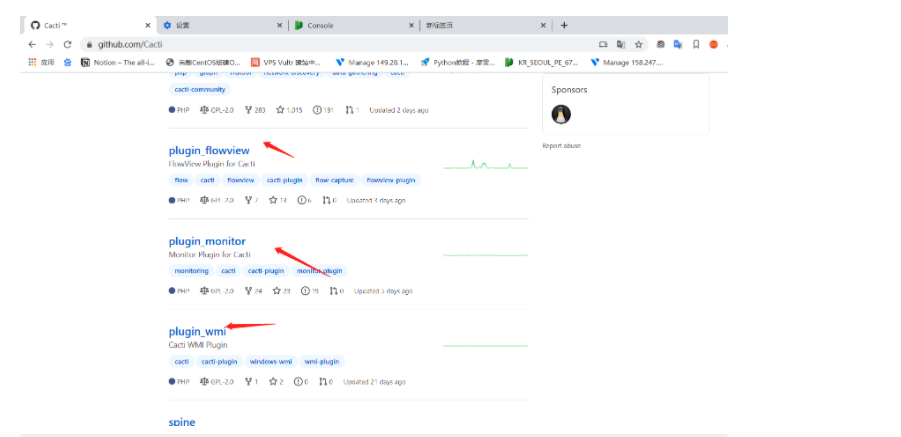
比如我要获取monitor这个插件:
点进去,这个就是下载连接,可以直接下载压缩包到本地,也可以使用git下载,这里使用git下载:
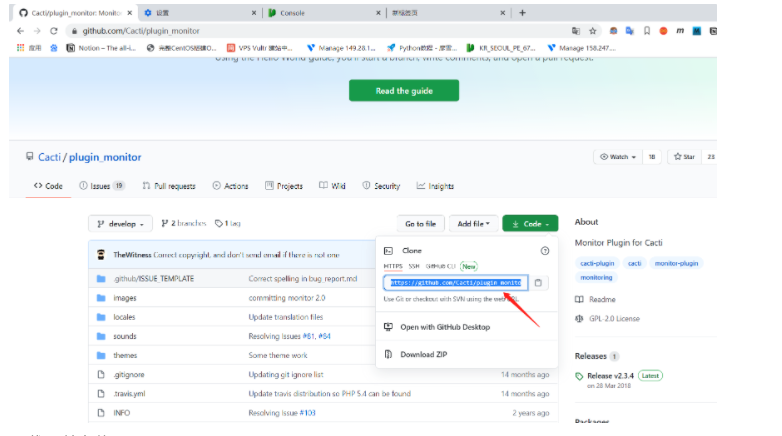
下载git并安装:
yum install -y git
git clone <https://github.com/Cacti/plugin_monitor.git>
mv plugin_monitor/ monitor #改个名字,将plugin去掉,不然cacti识别不了
此时进入cacti的web节点,按照下图点击,就可以看到这个插件,不过此时还无法安装启用,他告诉我们这个插件依赖于thold,于是我们需要将这个插件也下载下来
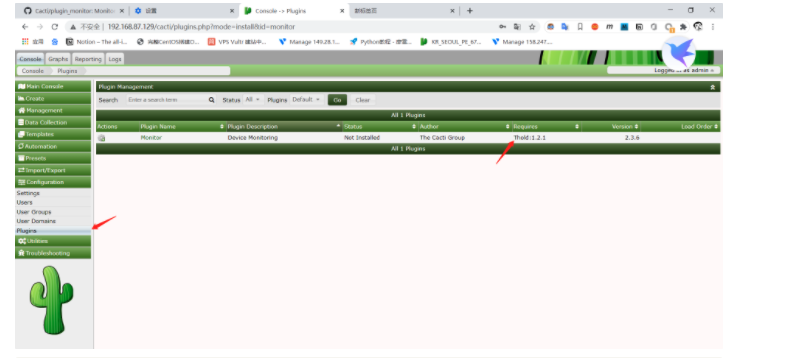
git clone <https://github.com/Cacti/plugin_thold.git>
mv mv plugin_thold/ thold
好了,我们在点击安装下插件:
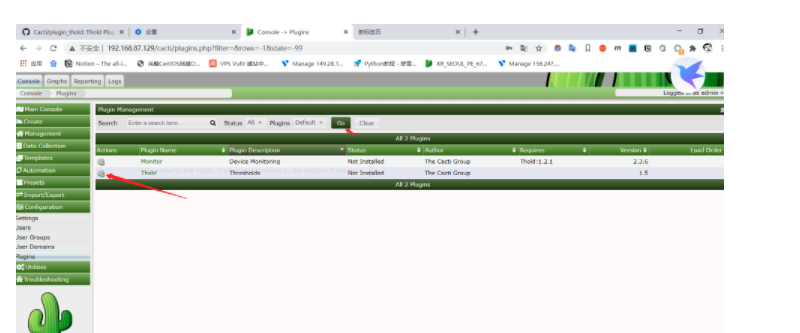
点击这个齿轮就可以安装启用了,如下图,我们把这俩插件都启用了:
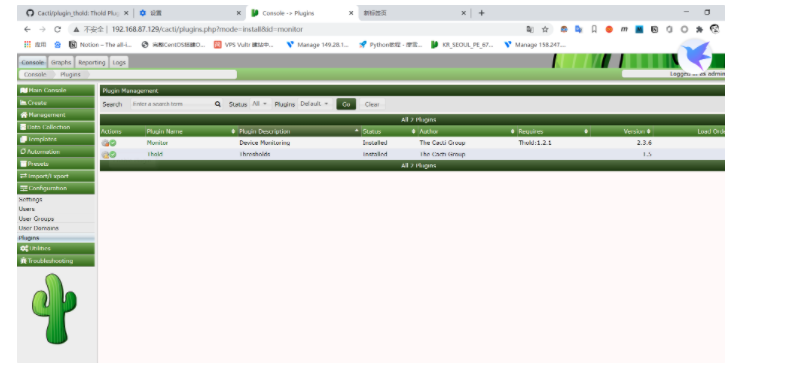
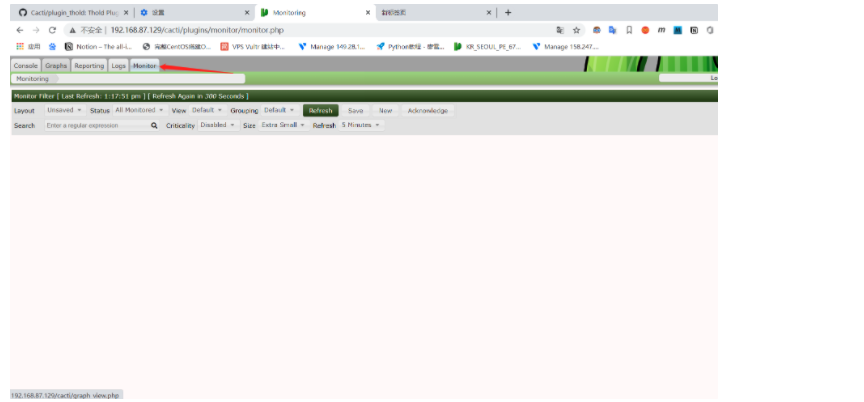
刷新下页面,就可以看到monitor这个插件了:
其他的插件也是这样的下载方法